Selecting the Best Siding for Your Climate Zone in 2025
Exterior siding selection extends beyond visual appeal to encompass performance in specific environmental conditions. Local climate influences material durability, maintenance requirements, and overall longevity. A siding option that excels in arid interiors may deteriorate rapidly in coastal humidity. Aligning siding with your climate zone safeguards the home structure and optimizes financial investment.
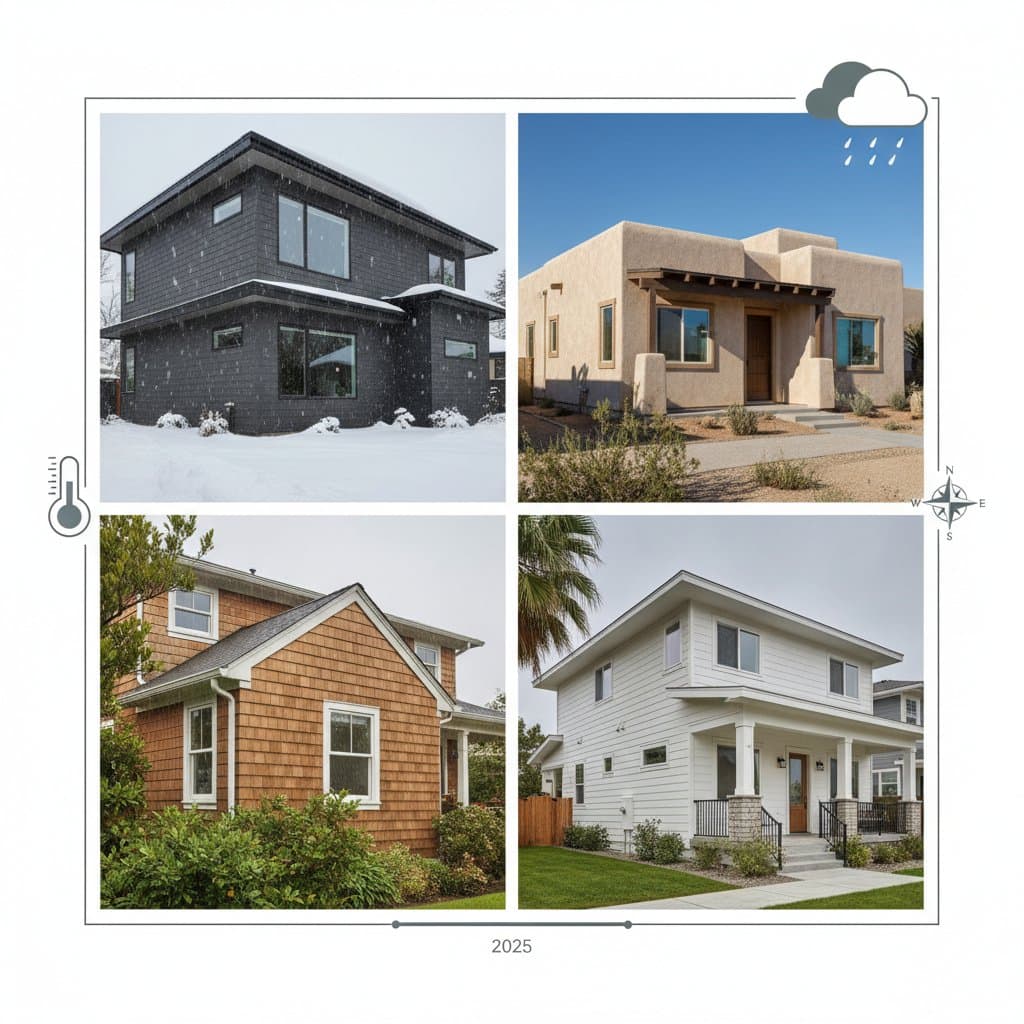
Understanding Climate Impacts on Siding Performance
Climate zones vary widely, from humid subtropics to arid deserts, each presenting unique challenges to building exteriors. In coastal areas, salt-laden winds accelerate corrosion and fading. Mountainous regions endure freeze-thaw cycles that crack rigid materials. Tropical zones demand resistance to heavy rainfall and high humidity to prevent mold growth. Identifying your zone, often defined by USDA hardiness maps or local building codes, guides material selection. For instance, vinyl siding suits moderate climates but requires UV protectants in sunny, dry locales.
Cost and Planning Essentials
Project Scope Overview
A comprehensive siding replacement involves removing existing panels, examining underlying sheathing for damage, installing an updated moisture barrier, adding trim and flashing, and applying the final finish. Many homeowners coordinate soffit, fascia, and gutter replacements simultaneously to achieve a unified building envelope. This integrated approach minimizes future disruptions and ensures consistent protection.
Cost Ranges and Influencing Factors
Complete siding installations for typical homes range from $14,000 to $42,000. Key factors driving these costs include:
-
Material Selection: Vinyl and fiber cement options occupy the mid-tier pricing. Engineered wood and metal panels command higher premiums due to their specialized manufacturing. Premium choices like cedar or composite boards reach the upper end of the spectrum.
-
Climate-Specific Adaptations: Enhanced features such as thicker insulation layers or rainscreen assemblies add $1 to $3 per square foot, particularly in extreme weather areas.
-
Site Accessibility and Structure: Elevated or multi-story homes necessitate scaffolding and equipment rentals, increasing labor expenses.
-
Design Intricacies: Elements like ornate trim, peaked gables, or blended material applications extend installation time and costs.
Timeline and Permitting Process
The bidding stage lasts 1 to 2 weeks, encompassing site assessments and detailed proposals. Material procurement and site preparation require 1 to 3 weeks, varying with availability and delivery logistics. Actual installation spans 5 to 10 working days for a standard single-family residence. Local authorities typically mandate a mid-project inspection for weatherproofing integrity and a final review for secure fastening compliance.
Budget Management Strategies
Secure a fixed labor rate agreement that specifies allowances for trim and flashing components. Insist on written authorization for any modifications to the original plan. Allocate a 10 percent contingency reserve to address unforeseen issues, such as rot or pest damage discovered during demolition.
Repair Options Versus Full Replacement
When damage affects fewer than 20 percent of panels, targeted repairs can prolong the system's life by several years. However, extensive issues like swelling, severe fading, or distortion signal that a full replacement proves more economical in the long term.
Durability and Safety Considerations
Regional Weather Challenges
Siding materials must withstand wind forces, moisture infiltration, and thermal fluctuations. Humid environments risk water accumulation behind panels, fostering mold and structural decay. Arid regions expose surfaces to intense ultraviolet radiation, which degrades finishes and embrittles polymers. Wind-prone locations require secure, interlocking designs paired with rust-resistant fasteners.
Resistance to Fire, Moisture, and Impact
-
Fire Performance: Fiber cement and metal sidings offer superior ignition resistance. Wood and vinyl variants require protective gypsum underlayment to mitigate burning or melting risks.
-
Moisture Management: Incorporate permeable weather barriers with sealed seams to allow vapor escape. Maintain a minimum six-inch gap between siding edges and ground level to deter capillary action.
-
Impact Durability: In hail-vulnerable zones, opt for heavier-gauge metal or reinforced vinyl formulations designed for impact absorption.
Building Envelope Best Practices
Effective installations prioritize water drainage and ventilation pathways. Install head flashing over window openings, kick-out diverters at roof-wall junctions, and base weep holes for moisture evacuation. In colder climates, integrate continuous exterior insulation to minimize interior condensation risks.
Maintenance Routine
| Task | Frequency | Guidelines |
|---|---|---|
| Clean siding using mild detergent solution | Annually | Refrain from high-pressure washing on wood or vinyl surfaces to avoid surface damage |
| Examine caulking and seams | Each spring | Apply sealant to any gaps exceeding one-eighth inch in width |
| Refresh paint or stain application | Every 5 to 10 years | Select products compatible with the original finish to preserve warranty terms |
| Clear gutters and downspouts | Biannually | Eliminate blockages to prevent water backup and resultant staining |
Warranty Fundamentals
Manufacturers provide limited warranties ranging from 25 years to lifetime material coverage, though labor warranties remain uncommon. Separate guarantees apply to paints and finishes, contingent upon documented adherence to cleaning and sealing protocols. Neglecting recommended maintenance routines may invalidate these protections.
Step-by-Step Preparation for Siding Installation
1. Establish Project Objectives
Determine if the initiative focuses on aesthetic enhancement or comprehensive envelope overhaul. Document specific concerns, such as air leaks, flaking coatings, or exterior noise transmission. Align these priorities with siding attributes like thermal insulation ratings or fire resistance classifications.
2. Identify Qualified Contractors
Prioritize licensed professionals experienced in regional climate demands. Verify familiarity with local building codes, proof of insurance coverage, and client testimonials from recent projects. Arrange to inspect a completed installation firsthand.
3. Evaluate Material Samples
Obtain life-size specimens illustrating texture, hue variations, and seam configurations. For intricate multi-tone designs, request a temporary test panel on the site to assess appearance under natural lighting before committing to full orders.
4. Prepare the Installation Site
Clear the perimeter of debris, furniture, and vegetation to facilitate safe access. Protect adjacent landscaping with tarps or barriers against dust and material fallout. Ensure utility lines remain marked and power sources are available for tools.
5. Implement Quality Assurance Measures
Monitor progress daily for alignment accuracy, secure fastening, and proper flashing placement. Conduct interim checks on moisture barrier integrity and insulation continuity. Upon completion, verify that all seams seal tightly and drainage features function as intended.
Maximizing Longevity Through Climate-Adapted Siding
Properly selected and installed siding attuned to local conditions endures for decades with routine attention. Such materials repel moisture effectively, retain vibrancy over time, and contribute to reduced energy consumption for climate control. Observe seasonal performance cues on your exterior walls. Prompt attention to minor upkeep averts major interventions and sustains the home's protective integrity.